Asset Editor provides very useful tools for animating cut-out character models. Using the Transform tool, you can move your character's parts to make your key poses, and let Asset Editor create the in-betweens. The timing of the movement can be adjusted to make life-like motion, and the drawings for the character's parts can be swapped at any point in your animation, allowing you to combine movement and drawing changes to create frame-perfect cut-out animations.
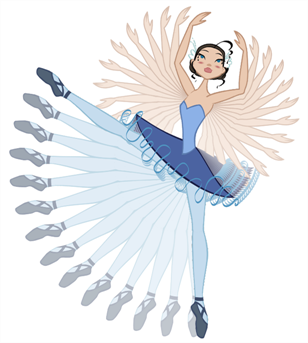
We will create a simple cut-out animation by making your character's first pose on the first frame, its second pose on a later frame, and letting Asset Editor interpolate them.
- In the Timeline view, collapse your character using the Expand/Collapse arrow.

- Select the first frame of the scene.

- To ensure your model doesn't disappear after 1 frame, open the Extend Exposure dialog by doing one of the following:
- Right-click on the first frame in the Timeline and select Extend Exposure.
- Press F5.
- In the Extend Exposure dialog, type in the amount of frames in your scene and confirm. This will make your model exposed (visible) throughout your whole scene.
-
Now, we will make your character's first pose. First, make sure there is a keyframe on the first frame of every layer of the model. This ensures that when you make the second pose later, your first pose will not be affected. To do this do one of the following:
- In the Timeline toolbar, click the
 Add Keyframe button.
 - Right-click and select Add Keyframe.
- Press F6.
- In the Timeline toolbar, click the
A keyframe is added on the current frame.

- In the Tools toolbar, select the
 Transform tool or press Shift + T.
- In the Tools toolbar, if
 Animate Off or
  Animate Onion Skin Range mode is selected, click on it to open the Animate pop-up menu and select
  Animate Current Frame.
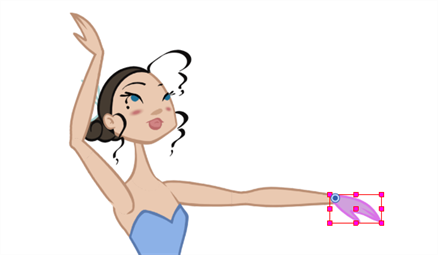
- In the Camera view, select the parts to animate. The Transform tool's control box will appear around the selected layer. Each part of the Transform tool control can be used to make different kinds of transformations:
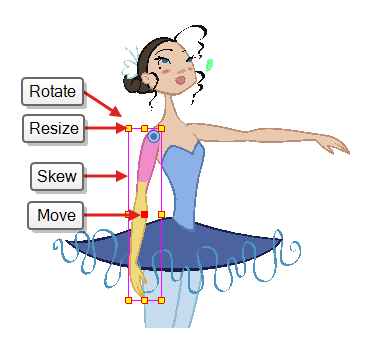
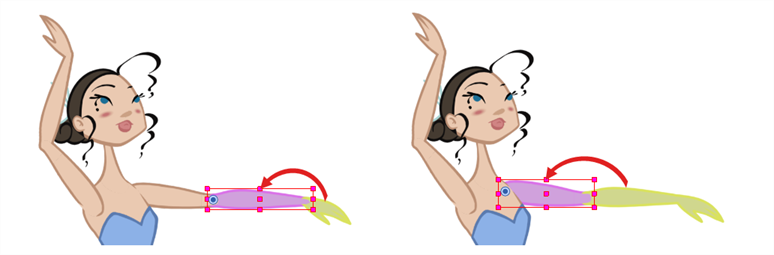
- Use the Transform
 tool to rotate, skew, scale or translate the selection to its new position.
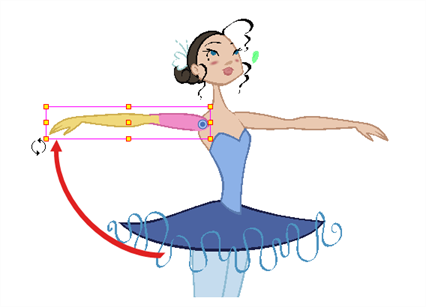
- Repeat for other parts of your character model until your first pose is complete.
- In the Tools toolbar, enable the
 Onion Skin feature.
- In the Timeline view, select the frame where you want to have your second pose.

-
Create keyframe for your second pose by doing one of the following:
- In the Timeline toolbar, click the Add Keyframe button.
- Right-click and select Add Keyframe.
- Press F6.
- In the Timeline toolbar, click the
Your second keyframe appears, along with a line going from your first keyframe to your second keyframe. This indicates that every frame in-between will be interpolated by Asset Editor.

If no line appears, it means your first keyframe was created as a stop-motion keyframe. To fix this, do one of the following.
- Right-click on the first keyframe and select Set Motion Keyframe.
- Select the first keyframe and press Ctrl + K (Windows/Linux) or ⌘ + K (macOS)
To make sure your new keyframes are set to Motion by default, select Animation from the top menu and make sure the Stop-Motion Keyframe option is unchecked.
- In the Camera view, change your character's pose again.
- Repeat this process for all the poses you wish to add to your animation.
-
In the Timeline view, collapse the hierarchy of the rig (or of the part of the rig) to which you want to apply an ease.
 NOTE When you apply an ease to a layer with children, and this layer’s hierarchy is collapsed, the ease is applied to that layer and all of its children.
-
Select one of your animation keyframes.
 NOTE You should only select one keyframe. The Set Ease for Multiple Parameters dialog can only edit the ease on one keyframe at a time, but it also allows you to quickly jump between keyframes in your timeline.
- Do one of the following:
- In the Timeline view, right-click and select Set Ease For Multiple Parameters.
- In the Timeline toolbar, you can click the Set Ease For Multiple Parameters
button.
The Set Ease For Multiple Parameters dialog box opens.

- In the Bezier editor, click and drag on the Bezier handle to adjust the ease for the selected keyframes.
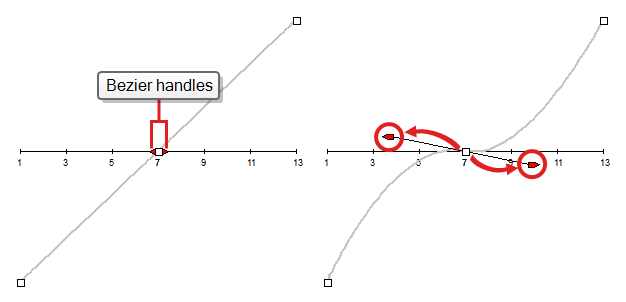
-
You can also adjust the easing by typing values in the Time Ratio and Value Ratio fields below the Bezier editor. The values are calculated in percentage.
- In the Left Time Ratio and Right Time Ratio fields, type the percentage value corresponding to the length of time you want the easing to last. This will move the Beziers horizontally, away from their keyframe. The value must be between 0% and 100%.
- In the Left Value Ratio and Right Value Ratio fields, type the percentage value of how skewed you want the ease to be. This will move the Bezier vertically, towards their nearest keyframe if the value is positive, or away the nearest keyframe if their value is negative. The value must be between 0% and 100%.
- To apply these easing parameters to a certain type of function only, such as Rotation or Scale, in the Filters section, deselect the function types you do not want to affect.
- Motion: Applies the easing parameters to the selected Position X, Position Y, Position Z and 3D Path functions
- Rotation: Applies the easing parameters to the selected Angle functions.
- Scale: Applies the easing parameters to the selected Scale functions.
- Skew: Applies the easing parameters to the selected Skew functions.
- Morphing: Applies the easing parameters to the selected Morphing Velocity functions.
- Other: Applies the easing parameters to all the other selected functions, such as all functions created to animate effect parameters.
- Click one of the following buttons:
- Apply/Previous: Applies the ease parameters to the selected keyframe and then jumps to the previous keyframe in the timeline so that you can adjust its ease next.
- Apply: Applies the easing parameters to the selected keyframe.
- Apply/Next: Applies the ease parameters to the selected keyframe, then jumps the next keyframe in the timeline so that you can adjust its ease next.
- Close: Closes the dialog box. If you did not apply the modifications, they will be cancelled
Navigating Layers
Since cut-out animation often involves complex models with extensive hierarchies, learning shortcuts to easily navigate between layers can save a lot of time.
One very useful trick to learn is the Centre on Selection command, along with its keyboard shortcut. This command allows you to navigate directly to the selected layer in the Timeline view. Hence, you can use the Camera view to visually select the layer you wish to work on, then use the Centre on Selection shortcut to find the layer in the Timeline view, instead of going through the scene structure to locate it.
- In the Timeline view, collapse all your layers.
- In the Tools toolbar, select the Transform tool.
- In the Camera view, select any layer.
- Do one of the following:
- Click on the Timeline view's tab to set the focus on it, then press O.
- In the Timeline view toolbar, click the
Centre on Selection button.
The Timeline view is now centred on the selected layer, and all its parents have been automatically expanded.
If you want to use the keyboard shortcut frequently, you might find that having to click on the Timeline view tab every time is tedious. To remedy this, you can enable the Focus On Mouse Enter preference. This will set the focus on a view as soon as your mouse cursor enters it, instantly making all of this view's keyboard shortcuts functional.
- From the top menu, go to Edit > Preferences (Windows/Linux) or Asset Editor > Preferences (macOS).
- Open the General tab.
- In the Options section, check the Focus On Mouse Enter check box.
- Click on OK.
Keyboard shortcuts for specific views will now work as soon as your mouse cursor enters the intended view.
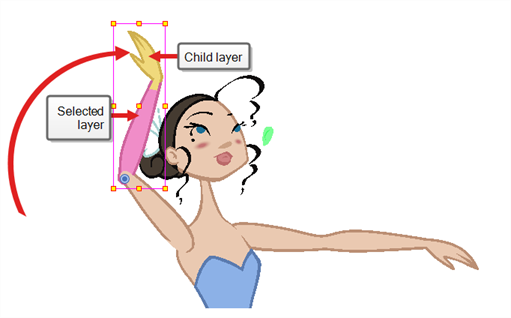
Asset Editor also has commands and keyboard shortcuts to quickly change your selection from the currently selected layer to its
- In the Tools toolbar, select the Transform tool.
- In the Transform Tool Properties view, make sure the Peg Selection
 mode is deselected.
- In the Camera or Timeline view, select a layer or object attached to a hierarchy.
-
Do one of the following:
- Select Animation > Select Parent or press B to select the parent layer.
- Select Animation > Select Child or press Shift + B to select the child layer.
- Select Animation > Select Children to select all child layers at the same time.
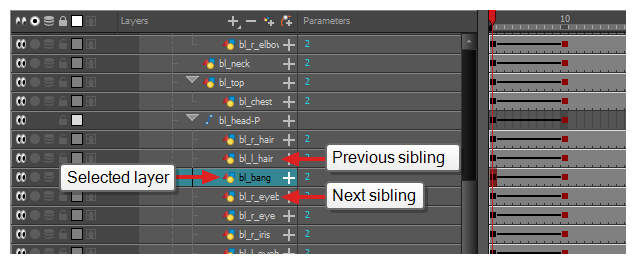
- In the Timeline view, select a layer that has at least one sibling and do the following:
- To select the previous sibling in the family, press /.
- To select the next sibling in the family, press the question mark (?) key.