Adding Effects Through the Timeline View
To add effect in the Timeline view:
|
1.
|
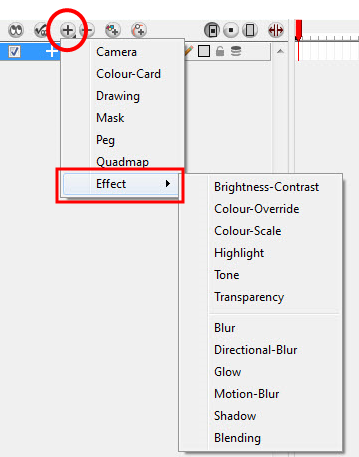
In the Timeline view, click on the Add Layers button and from the Layers drop-down menu, select Effects > the desired effect. You can also select Insert > Effects > the desired effect from the top menu. |
|
2.
|
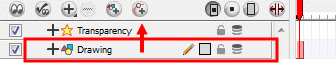
The effect appears in the Timeline view. |
|
3.
|
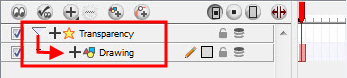
Drag the drawing layer on the new effect layer to parent them. |
|
4.
|
In the Camera view, click on the Render View Mode  button to see the result of rendering the scene's current frame and the effect . button to see the result of rendering the scene's current frame and the effect . |
|
5.
|
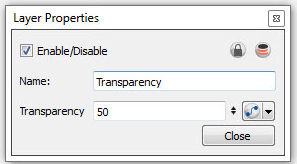
In the Timeline view, double-click on the effect layer to open the Layer Properties view. |
The Layer Properties view opens, displaying the parameters available for the selected effect.
|
6.
|
In the Layer Properties view, adjust the effect’s parameters. |
|
7.
|
In the Camera view, click on the Update Preview button to update the rendered preview. button to update the rendered preview. |
|
8.
|
To play back your scene with the final effects, in the Playback toolbar, click on the Render and Play button. button. |
Once you have set the parameters for your effect, you can store it in the Library view as a template so you can quickly reuse it later on without having to set the parameters again.
Refer to
Creating a Template to learn more about creating templates.