Pencil Tool Options
When you select the Pencil ![]() tool, its properties and options appears in the Tool Properties view.
tool, its properties and options appears in the Tool Properties view.
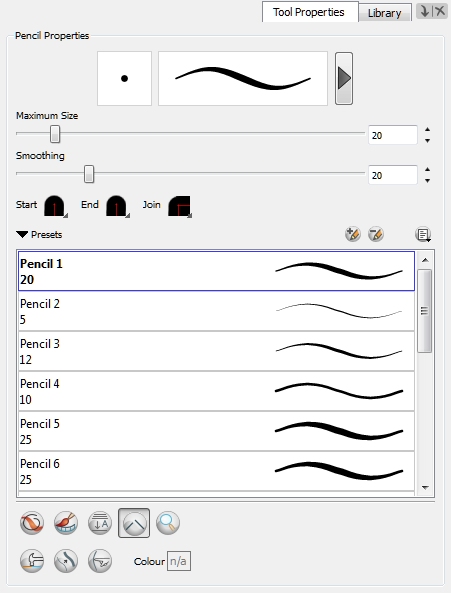
These are the options available for the Pencil tool:
| • | Draw Behind |
| • | Pencil Tool Options |
| • | Auto-Flatten Mode |
| • | Auto-Close Gap |
| • | Line Building Mode |
| • | Auto Adjust Thickness |
| • | Line Pushing Mode |
| • | Thickness Stencils |
| • | Minimum and Maximum Size |
| • | Central Line Smoothness |
| • | Contour Optimization |
| • | Changing the Line Shape |
| • | Previewing the Stroke |
| • | Pencil Line Texture |
 Draw Behind

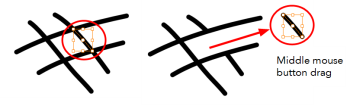
 Auto-Flatten Mode
Using the Select tool, you can use the middle mouse button to select a segment of a flattened pencil line to create a nice finish on the lines and corners of your artwork.
Auto-Close Gap
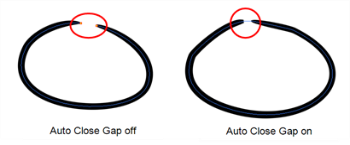
When using the pencil tool, you can automatically close strokes with an invisible stroke.
It is recommended to keep this option enabled when drawing with the Pencil tool.
Line Building Mode
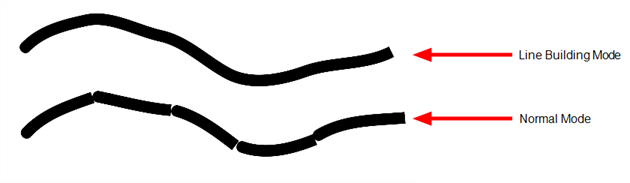
The Line Building ![]() mode is very useful when drawing long lines and curves in small increments with pencil lines. As the pencil lines are central vector lines and it may be difficult to align the line tips perfectly to create a uniform stroke and close all gaps.
mode is very useful when drawing long lines and curves in small increments with pencil lines. As the pencil lines are central vector lines and it may be difficult to align the line tips perfectly to create a uniform stroke and close all gaps.
In this mode, you can draw lines in small increments and the tip are merge into one single stroke.
Auto Adjust Thickness
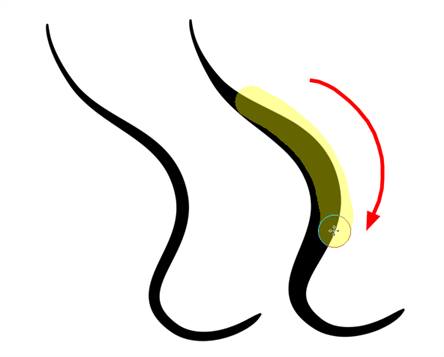
The Auto Adjust Thickness ![]() tool is useful when you want to render a portion of a line thicker. When tracing a drawing on paper, you will often go back to a section of a curve to make it thicker to add dynamism to the line. Using the Auto Adjust Thickness tool, you can draw highlight strokes over the section to make thicker. Once you release the pen or the mouse, the line gets thicker following the shape and curve of the original stroke. This way is much faster and smoother than using the Pencil Editor tool. You do not have to add extra points and adjust the position and Bezier handles.
tool is useful when you want to render a portion of a line thicker. When tracing a drawing on paper, you will often go back to a section of a curve to make it thicker to add dynamism to the line. Using the Auto Adjust Thickness tool, you can draw highlight strokes over the section to make thicker. Once you release the pen or the mouse, the line gets thicker following the shape and curve of the original stroke. This way is much faster and smoother than using the Pencil Editor tool. You do not have to add extra points and adjust the position and Bezier handles.
The default overlay colour is light yellow. If this colour is difficult to see because of your background or drawing colour, you can adjust the colour.
To change the Auto Adjust Thickness Colour:
| 1. | In the Tools toolbar, select the Pencil |
| 2. | In the Tool Properties view, select the Auto Adjust Thickness |
| 3. | Click the colour swatch. |
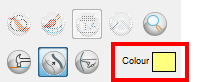
The Colour Picker window opens.
| 4. | In the Colour Picker window, select a new colour. |
Line Pushing Mode
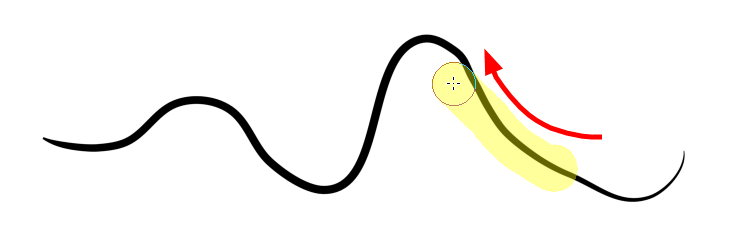
The Line Pushing Mode ![]() option lets you draw highlight strokes over your existing pencil lines. You can reshape the curves. Depending how you draw the pushing stroke over your line, the highlighted section will be reshaped in one direction or the other.
option lets you draw highlight strokes over your existing pencil lines. You can reshape the curves. Depending how you draw the pushing stroke over your line, the highlighted section will be reshaped in one direction or the other.
The default overlay colour is light yellow. If this colour is difficult to see because of your background or drawing colour, you can adjust the colour.
To change the Line Pushing Mode colour:
| 1. | In the Tools toolbar, select the Pencil |
| 2. | In the Tool Properties view, select the Line Pushing Mode |
| 3. | Click the colour swatch. |
The Colour Picker window opens.
| 4. | In the Colour Picker window, select a new colour. |
Thickness Stencils
Toon Boom Animate Pro provides a variety of thickness stencils and also lets you create and save your own. It is a good idea to create and save pencils with precise sizes and parameters when you draw and design.
A thickness stencil saves a preset of how the thickness information looks across the length of the line. When drawing with a thickness stencil, the pressure sensitivity of the tablet is discarded in order to apply the thickness stencil.
A thickness stencil can be used while drawing, or applied afterwards.
You also have the possibility to apply different textures to your lines by either using the preset ones or importing your own—see Working with Thickness Stencils
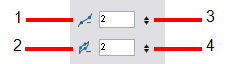
Minimum and Maximum Size
This is where you set the minimum and maximum sizes of your drawing tool which will produce the thick and thin effect on your stroke. This works with the pressure sensitivity of a pen tablet.
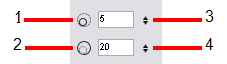
| 1. | Minimum Size field: Type a value in this field to set the minimum width of the line. |
| 2. | Maximum Size field: Type a value in this field to set the maximum width of the line. |
| 3. | Up/Down arrows: Use the up and down arrows to set the minimum size value. |
| 4. | Up/Down arrows: Use the up and down arrows to set the maximum size value. |
Central Line Smoothness
You can modify the Central Line Smoothness ![]() of your line using this option. This parameter smoothes the initial movement of your line. Increasing the value will result in a smoother line with fewer control points.
of your line using this option. This parameter smoothes the initial movement of your line. Increasing the value will result in a smoother line with fewer control points.
Contour Optimization
You can optimize the Contour Line Smoothness of you line using this option. This parameter will smooth the contour of your line once the line has been traced, the higher the value the less control points will compose your line.
| 1. | Smoothness field: Type a value to set the smoothness of the line. |
| 2. | Contour Optimization field: Type a value to set the contour optimization of the line. |
| 3. | Up/Down arrows: Use the up and down arrows to set smoothness value. |
| 4. | Up/Down arrows: Use the up and down arrows to set the contour optimization value. |
Changing the Line Shape
There are several line shape to choose from. You can select how the start, end, and joints in the pencil line are drawn.
To change the line shape:
In the Pencil Properties window, click a line shape in the Shape section and select a shape from the menu.
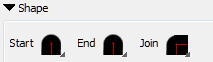
| • | Start: Make the beginning of the line round or flat. |
| • | End: Make the end of the line round or flat. |
| • | Join: Make joints round, mitred, or bevelled. |
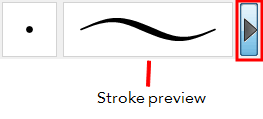
Previewing the Stroke
The Preview area lets you see a preview of the stroke that will be produced after you customize the different parameters in the Tool Properties view.
Pencil Line Texture
You can apply a bitmap texture on your pencil line and adjust it as needed—see Pencil Line Texture
Related Topics
| • | Drawing with Line Texture |
| • | Pencil Line Texture |
| • | Working with Thickness Stencils |
| • | Drawing Using the Pencil Tool |